This page documents the steps to publish an article on Diff from a meta and technical perspective. See the editorial guidelines for definitions on the scope for Diff, general overview of the editorial process, and further details on taxonomy.
First, be sure you have successfully logged in to Diff. You can join Diff by authenticating using your Wikimedia account (use the “Login with MediaWiki” button). Once logged into the blog you will see the Diff editing interface. If you have the text of your post prepared, you can copy/paste into the editor. You can also start from a blank entry in the blog and make multiple updates and edits.
The editor
The WordPress editor uses the concept of “blocks”. Each element of your post is a separate block, allowing you to add and customize each individually. To learn more about blocks see this documentation.
https://wordpress.com/support/wordpress-editor/#adding-a-block
Media
Any media used in your post should be freely licensed and will need attribution. For interoperability, please use filenames that use the US ASCII charset. In other words, avoid accentuated characters eg. é à ç or Cyrillic characters.
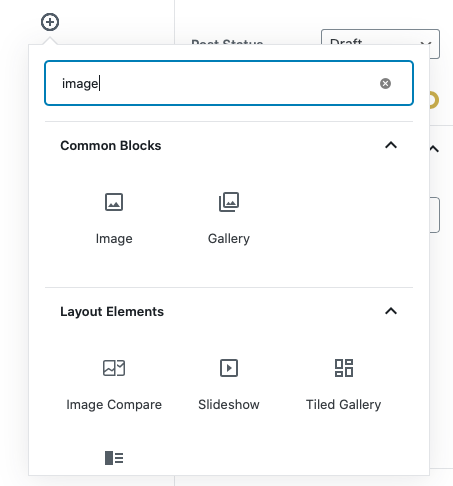
Adding images
The recommended method is to directly upload media to Diff. This requires you to add the attribution metadata manually.
- Add a new block
- Select “Image”
- Upload a copy of the image from your computer. For photos, we suggest using one that is 1,280 pixels along the longest dimension.
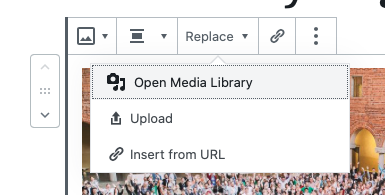
Adding Attribution
- Select Replace from the block menu, then Media library.
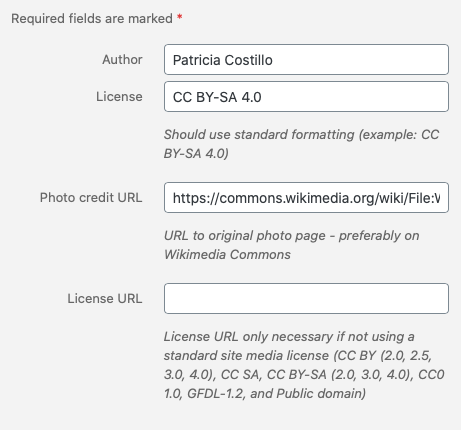
- Your chosen image will be selected. Next to the image you will see fields to define the Title, Author, License, and Photo Credit URL.
We also encourage you to change the link for the image to the source – ideally on Wikimedia Commons. You can do this by selecting an image, and using the link icon to specify a URL.
Featured Image
Every post should include one image to help with providing context to your article and drawing reader interest. You can use the “Featured Image” feature in WordPress to choose a single primary image to represent your article.
When editing your article, look for the “Featured Image” options in the sidebar. Select an image from the Media Library.
Galleries and light boxes
If you wish to allow readers to view images at a larger size, say to show more detail, you can insert them into a Gallery.
- Add a new block
- Select “Gallery”
- Upload a copy of the image from your computer or use existing media you have uploaded in the Media Library.
Note: If you are copying and pasting a draft from a source like a Google Doc, please make sure you manually upload any images into WordPress. A copy/paste will incorrectly reference images from the Google doc.
Adding video
You can also embed content from YouTube and other services by copying and pasting the full URL into the editor. WordPress will expand and embed the media automatically.
Metadata
Make sure the metadata attributes for your post are correct.
WordPress metadata
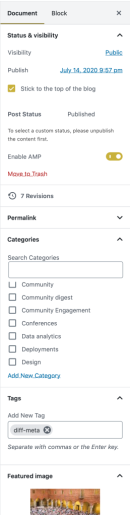
- Publish date and time – the blog uses UTC. Be sure that the date and time is what you want before publishing. The default setting is “Immediately”. It is possible to publish something with an older date (and it won’t appear correctly in the news feed) or with a future date (it won’t publish until that date arrives).
- Blog categories – These are pre-defined high-level categories. We recommend your post appears in one of the five content categories. This helps make sure your posts appear to readers as they navigate Diff. Posts can be in multiple categories.
- Blog tags – these are open-ended tags specific to a blog post. Posts can have multiple tags.
- Authorship – make sure the desired author names are selected. You can change how your name and bio is displayed in your profile.
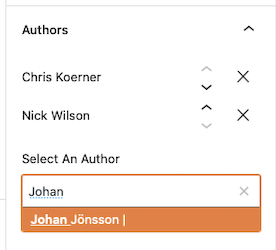
- If a blog post is written by multiple authors please add the author names in the Authors menu in the editor sidebar.
- Languages – If writing in a language other than English, make sure you have the correct language selected here.
Scheduling
Users with administrative rights on the blog can publish posts, but any editor can prepare a post to make scheduling easier.
You may select a proposed date and time for publication, or leave this step to the editorial team. If you’d like to propose a time, take a look at the editorial calendar. You should see your post on the current date by default. Drag and drop your draft to the desired date. Make sure there are no other posts scheduled to go out around the same time. You want your post to shine, so give it some space!
Take a look at the calendar and see what other topics are being posted in that week. Do we find ourselves very heavy with posts in a specific category? Can we schedule a post for a later or earlier date to spread things out a bit?
Blog times are in UTC. Wikimedia is international. We recommend posting when natural breaks in the day occur. In the morning (07:00-9:00), afternoon (11:00-13:00) and evening (18:00-20:00). These times are flexible depending on your intended audience.
As items are moved around the editorial calendar the date and time set to publish can sometimes be incorrect. Check the publishing settings before scheduling. The status in the editorial calendar should be “Scheduled” and will be indicated with a purple color. Note that the post will not be published until a review is complete.
Then you’ll need someone to review it. The editorial team will receive a notification when a new post is submitted for review. This review follows the editorial guidelines – checking for grammar, structure, and scope.
Other notes
Republishing
If your post is republished content please be sure to put a link to the initial publication at the bottom of the article. Use italicization for the entire citation. Select the “small” font size in the editing sidebar.
- Originally posted by <author> to <original venue> on <date>.
- Example: Originally posted by Jimbo Wales to Wikimedia-l on 1 April 2019.
Be sure to take the time and format any republished content for the blog. Don’t just copy/paste from existing sources. Take advantage of the various layout options in WordPress to make your post more accessible. Check for line breaks and formatting when you do copy over. Make any footnotes (like those found in mailing list posts) into hyperlinks.
Authorship
By default posts you write will appear with your user name in the attribution. You can change how your attribution appears in your WordPress profile. You can also add a short biography to your profile which will appear in the archive page for your posts (Example).
Multiple authors can be added to a blog post. The Authors panel allows you to search for existing authors and rearrange the listing.
If publishing on behalf of someone else, please try and have them create an account in Diff so you can assign authorship. If you cannot, guest authorship can be assigned from the Authors panel. Contact the Diff team (diff@wikimedia.org) and someone can help create a guest author.